General
Standard Auction
- Preparation
- Guest Checkin
- Entering Bids & Pledges
- Guest Checkout
- Item Pickup
- Reports
Mobile Enhanced Auction
This section will cover guest checkout by auction helpers. Even if you enable mobile checkout, there may be some guests who do not have a mobile device or who need assistance to make checkout. The following documentation covers how to checkout a guest.
GUESTS CHECKOUTS CANNOT BEGIN BEFORE ALL PLEDGES AND DONATIONS ARE ENTERED!
This is emphasized so you consider when the last donations and bids are entered. Having an activity where a lot of guests make donations is super awesome. These should be recorded on the general ledger. The important thing to remember is that it takes time to enter these into BIDS. The best method is to divide the sheets amongst multiple helpers. But still plan to leave them time to do this accurately.
Guest Checkout
Checkout has three steps:
- Search
- Verify
- Payment
- Review
Search
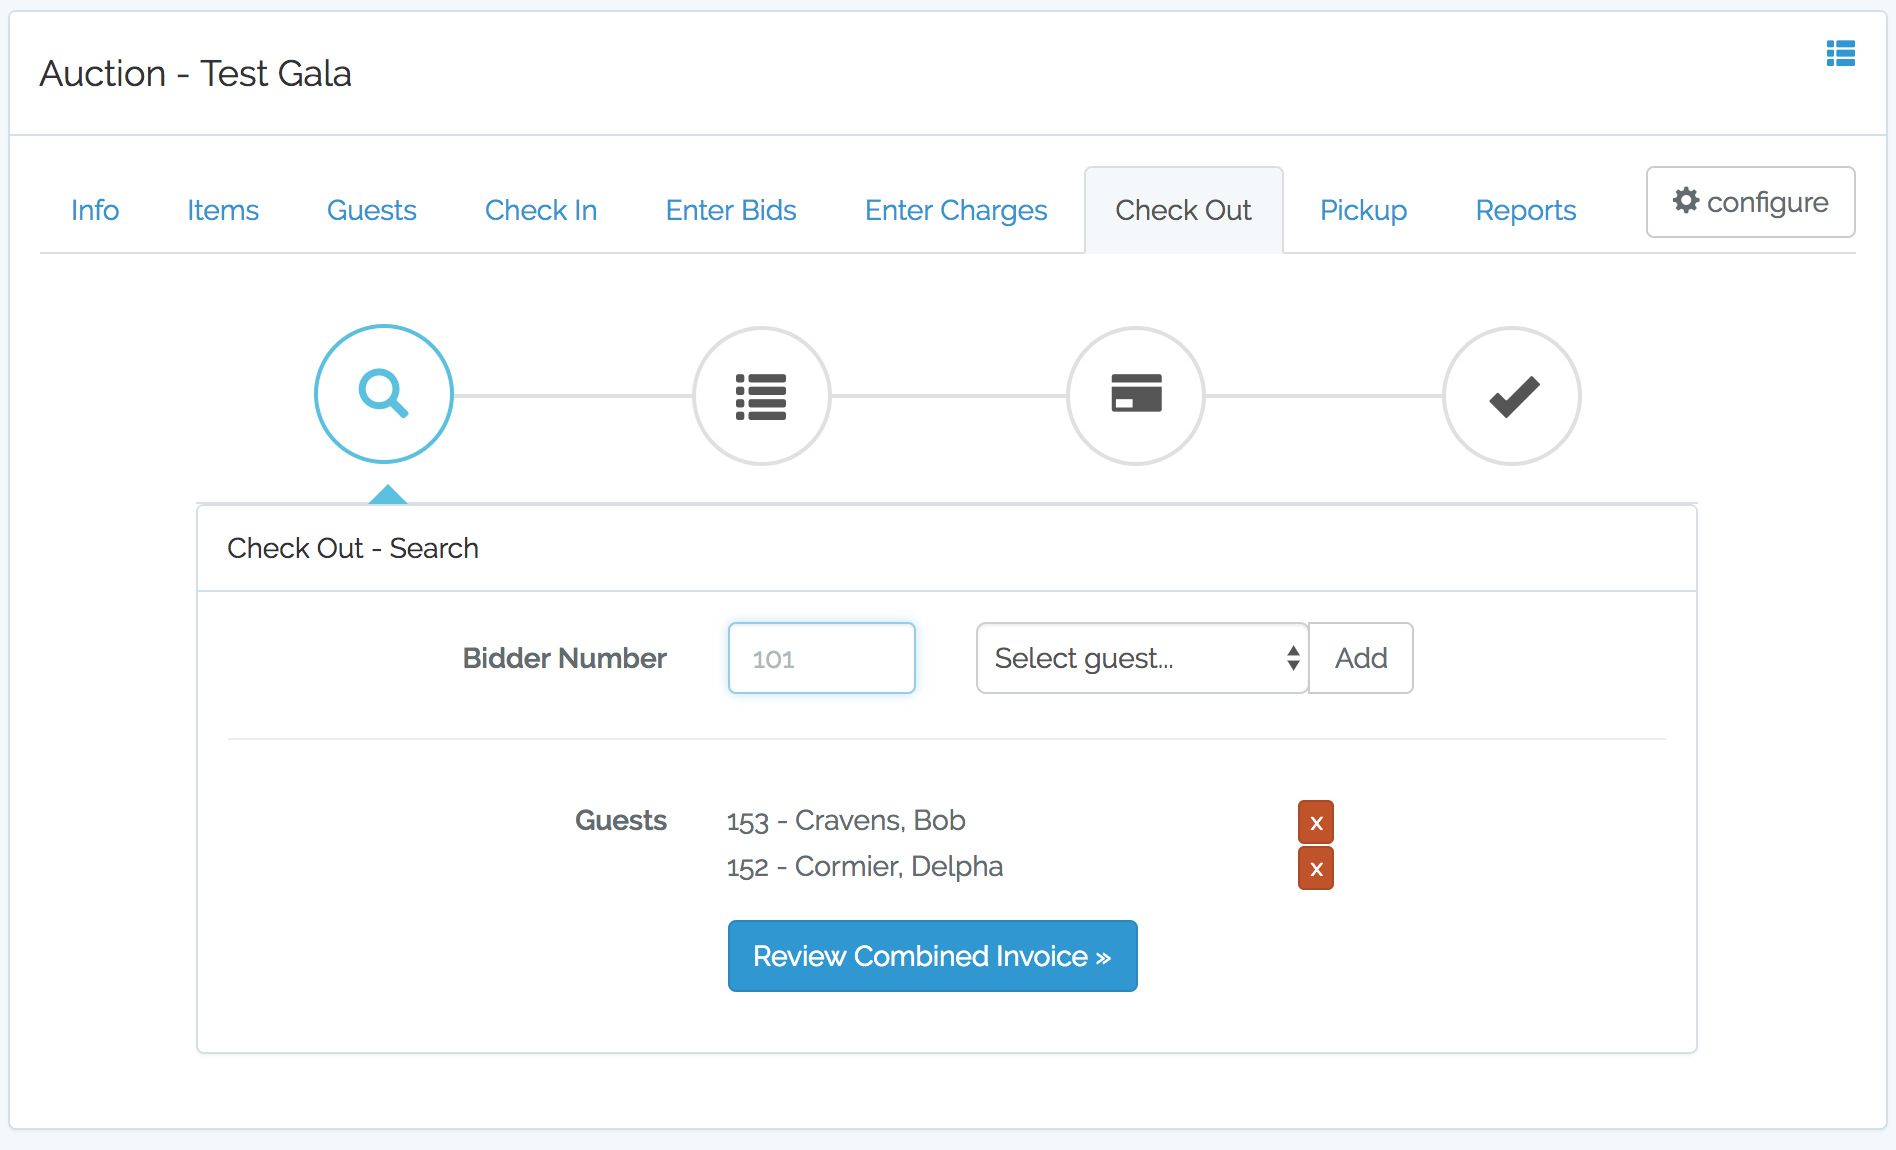
Multiple guests can be checkout as long as there is a single payer. So for example, a husband / wife could checkout together. THe above screenshot shows the search page with two guests (Bob Cravens and Delpa Cormier) being checked out together. To add a guest to the checkout, enter their bidder number (from their name badge) into the "Bidder Number" field and press the TAB key. To remove a guest from the checkout click the "red X" next to their name. Once all the guests are in the list, click the "Review Combined Invioce" button.
Verify

The screen above shows the combined invoice for the selected guests. The selected guests are shown in the list at the top. This is followed by an itemized list of items they have won and donations they have made. In the invoce above, there is a single unpaid item and three unpaid donations (or charges). In addition, there are a number of items / donations that have already been checked out.
It is a good idea to review this list with the guest to ensure the unpaid items are accurate. Items that should be removed from this checkout, should be unchecked before clicking the "Select Payment Options" button.
Payment
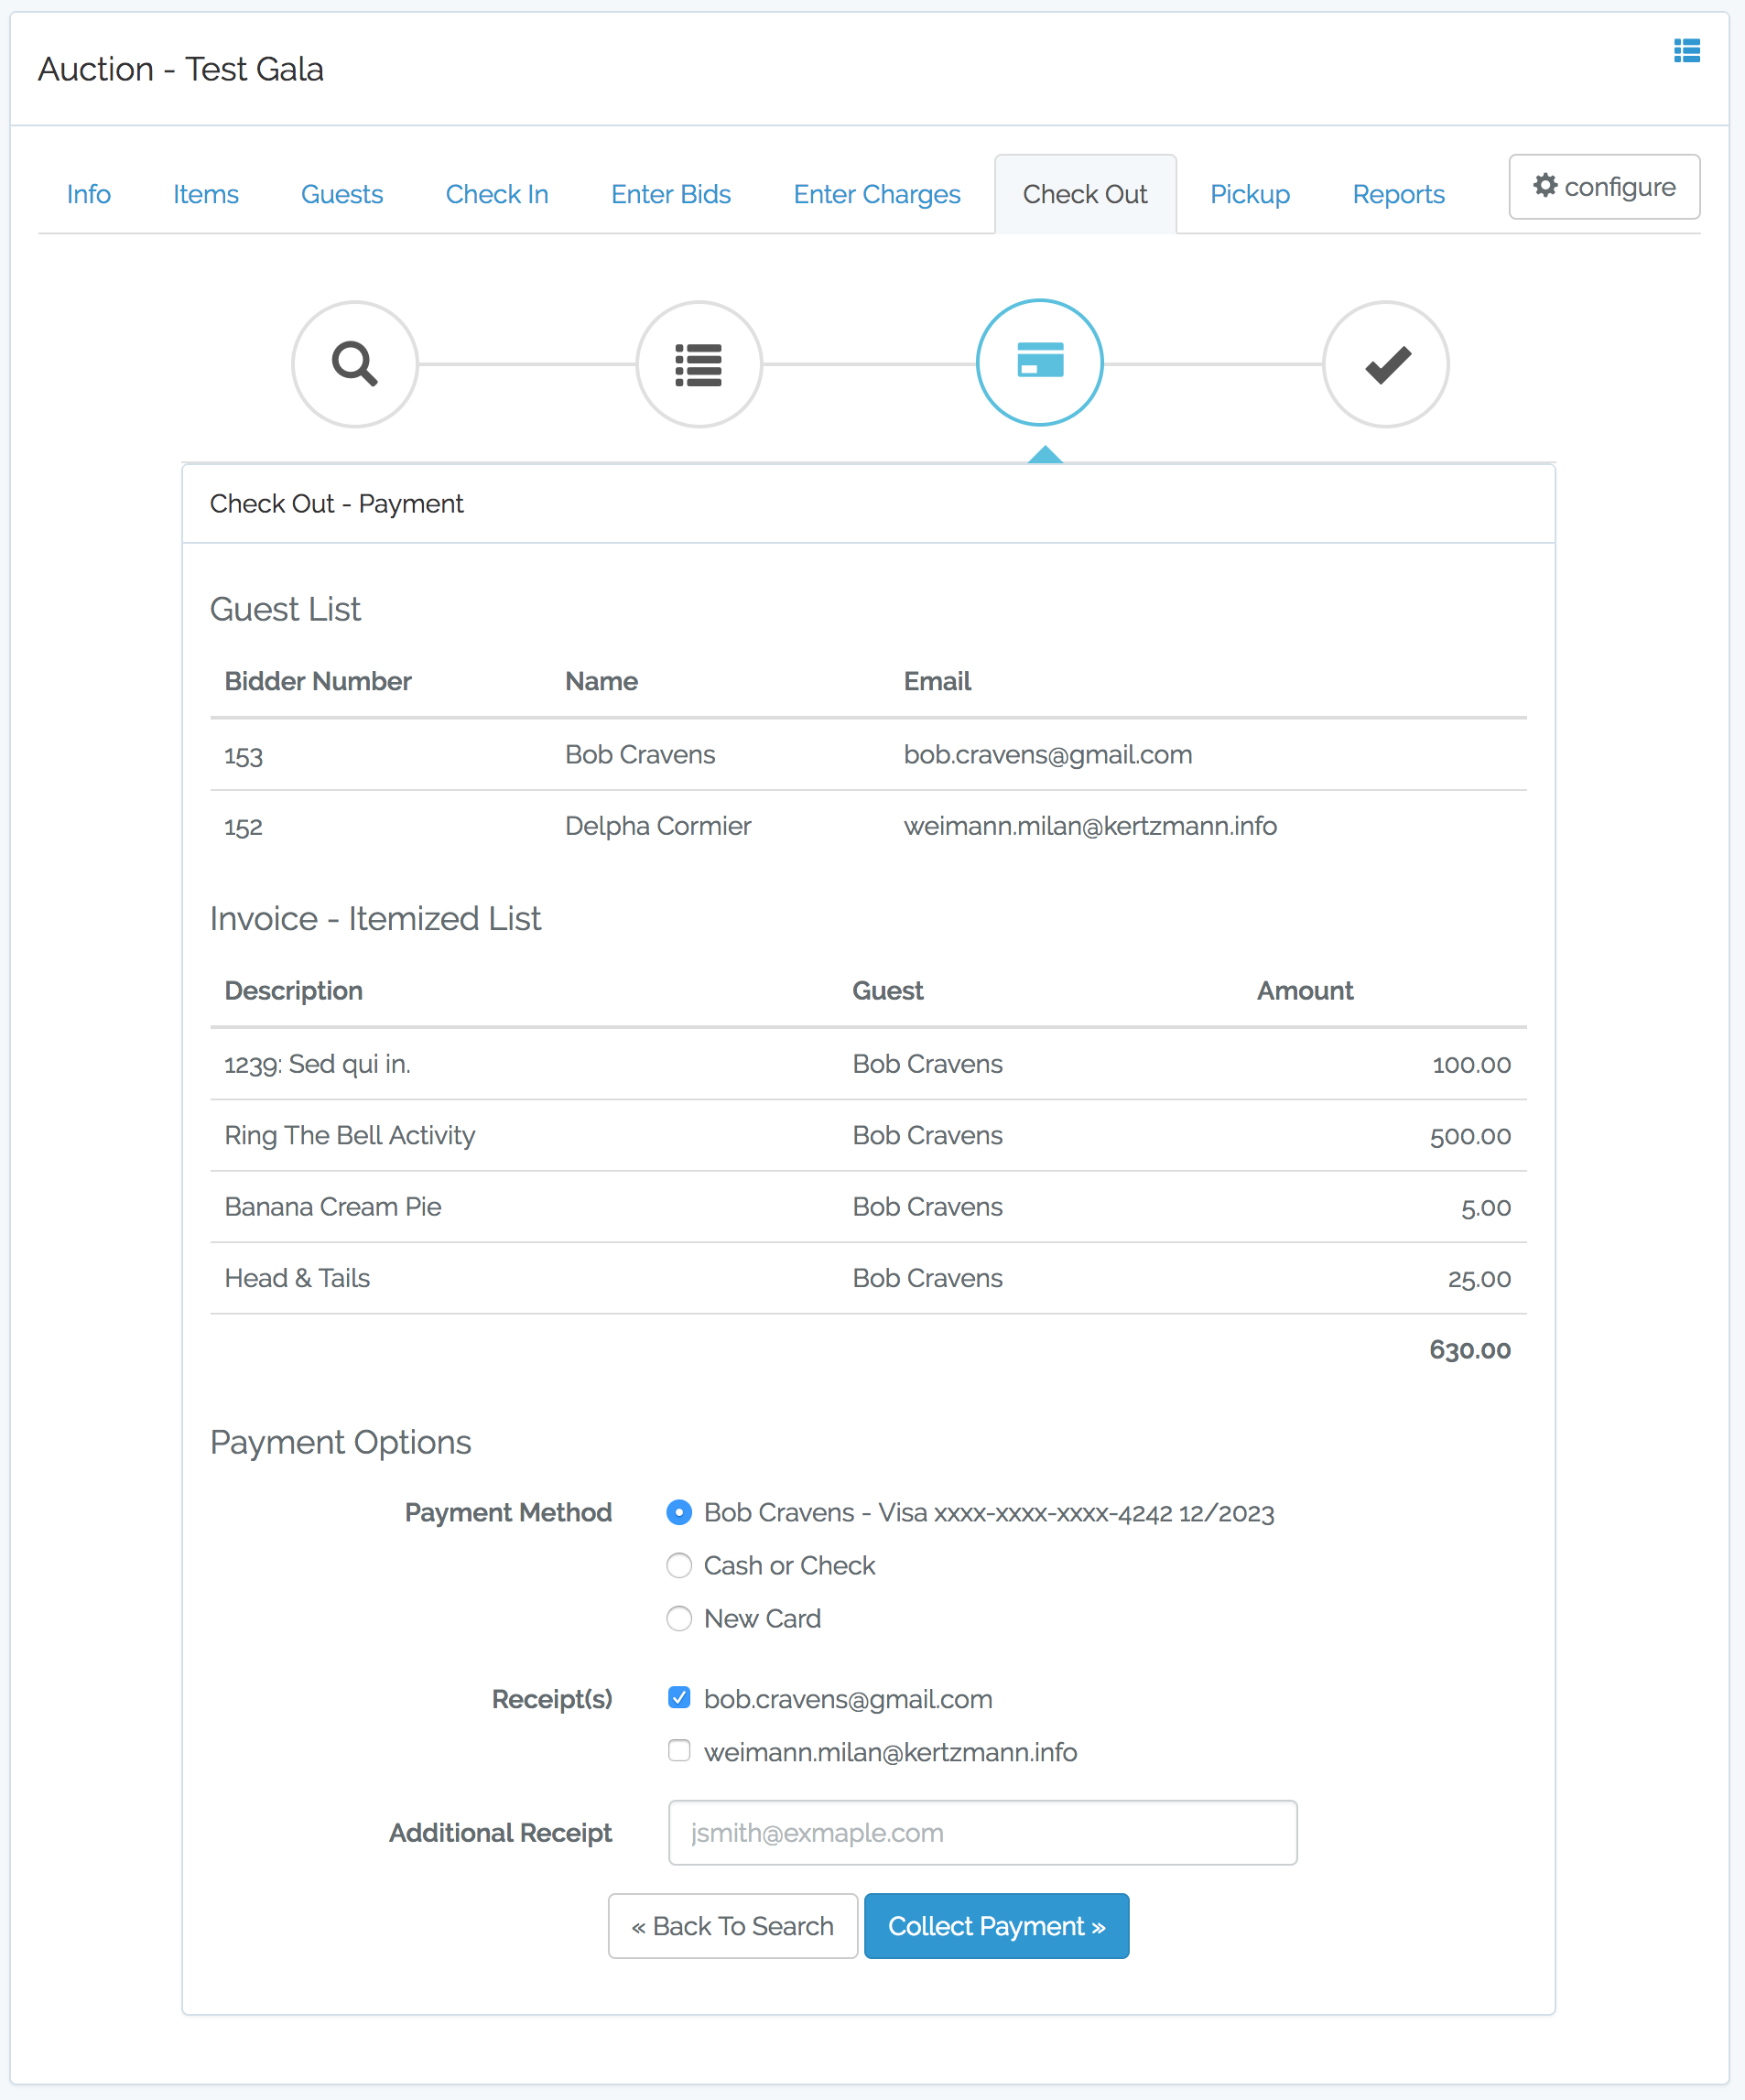
The screen above again shows the guest list. Now the items / charges that were previously selected are shown. These are the items that are going to be checked out.
In the "Payment Options" section there are a few choices. The above image shows a previously entered (probably at checking) payment method (Bob Cravens - Visa xxxx-xxxx-xxxx-4242 12/2023) selected. The following image shows the "Cash or Check" option.
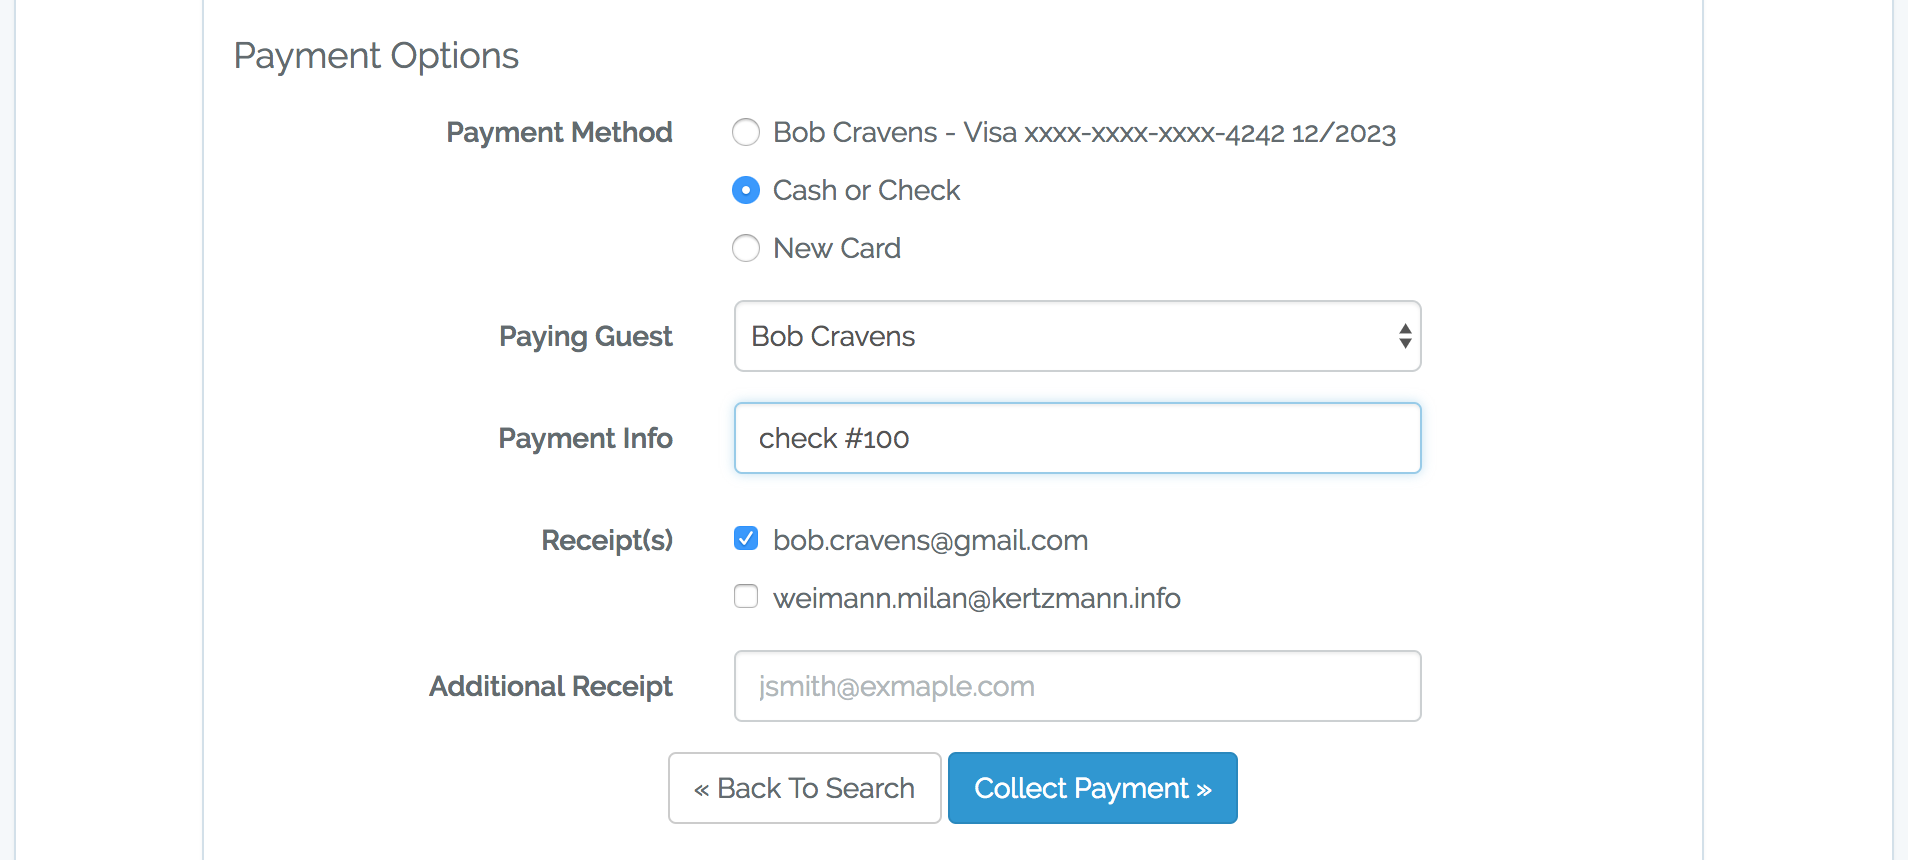
In this option, you must select the paying guest and enter a info about the payment (e.g. check number). The final option allows you to enter a new or replacement credit card.
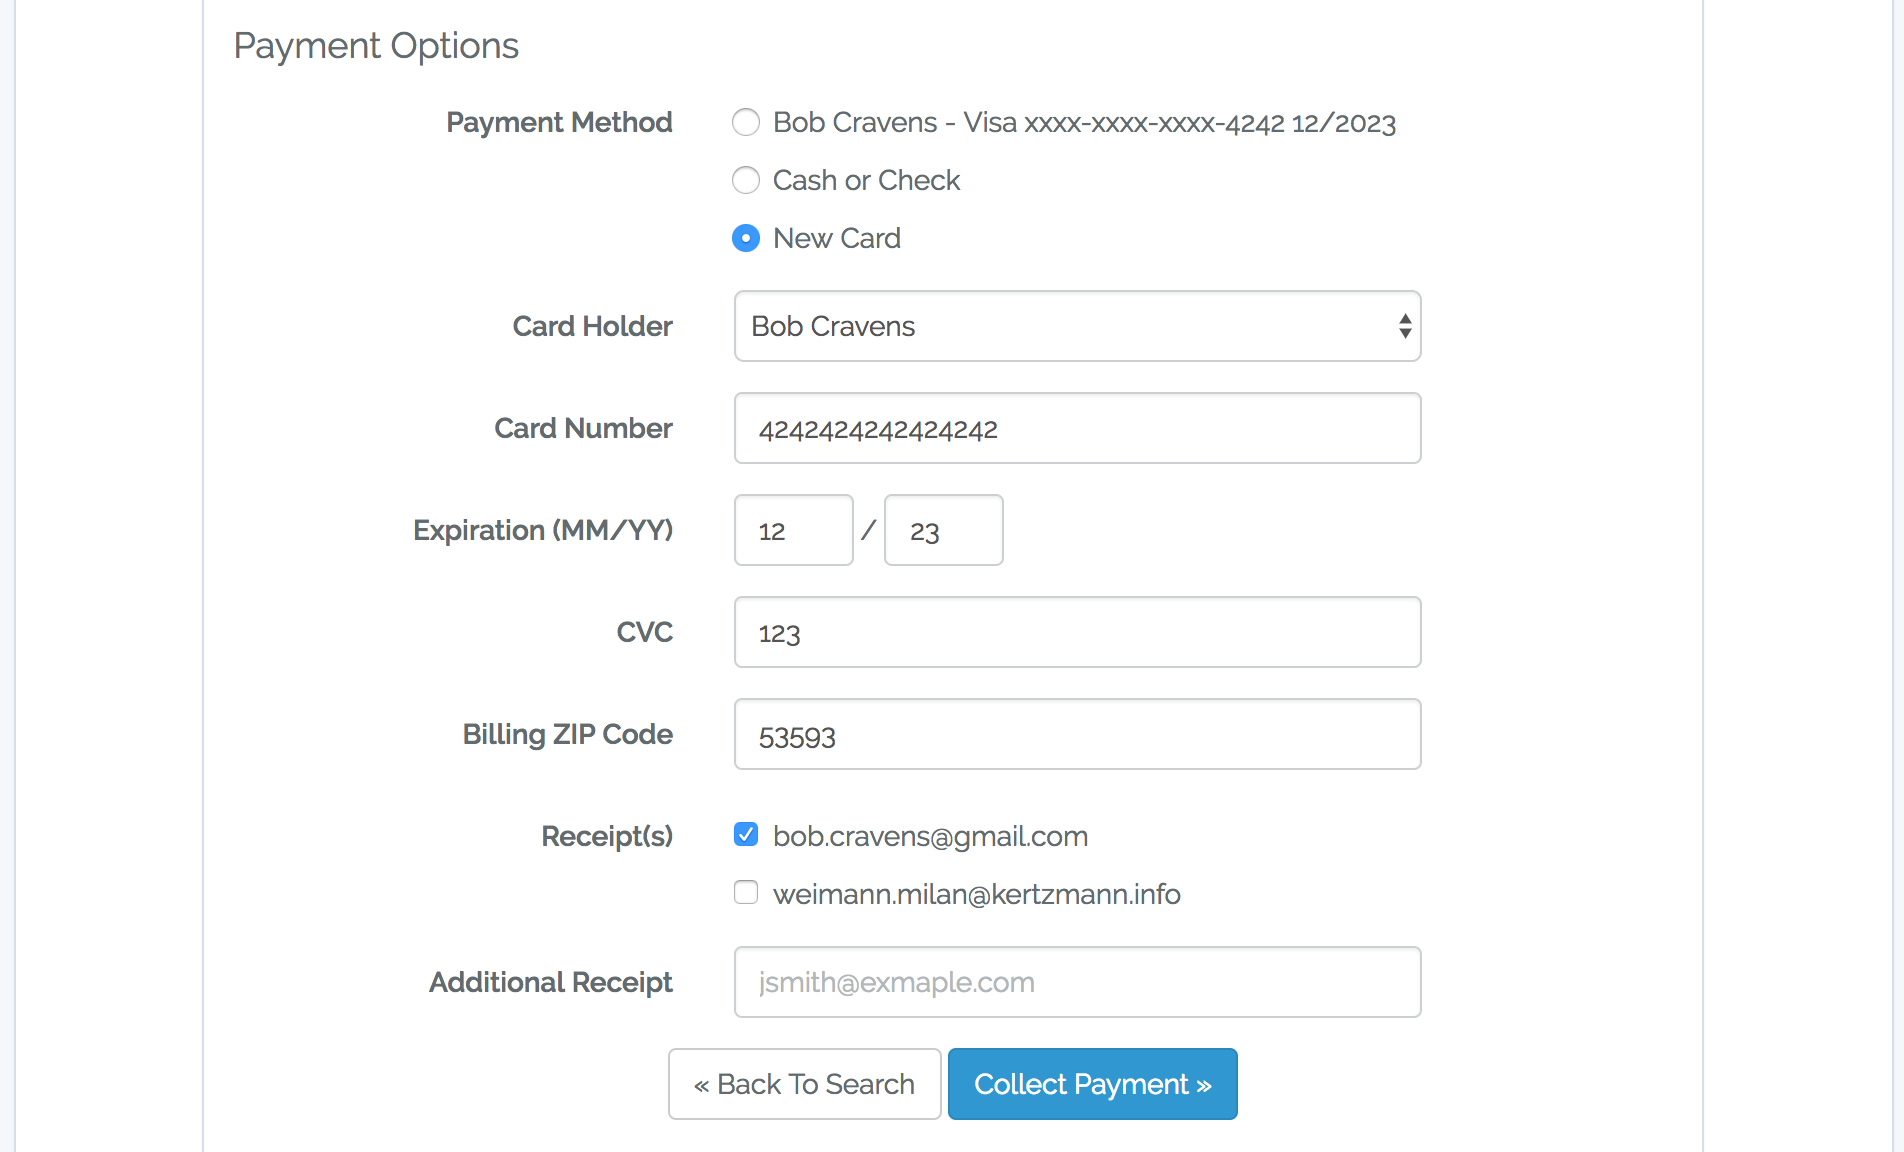
In this option the standard card info is entered: card holder, number, expiration, cvc and billing zip code.
The final option on this page is the receipt email configuration. Previously entered (at checkin) guest emails are shown at the top. This is followed by field where a different email address can be added. Clicking the "Collect Payment" button will collect the payment and send any notification (more later).
Review
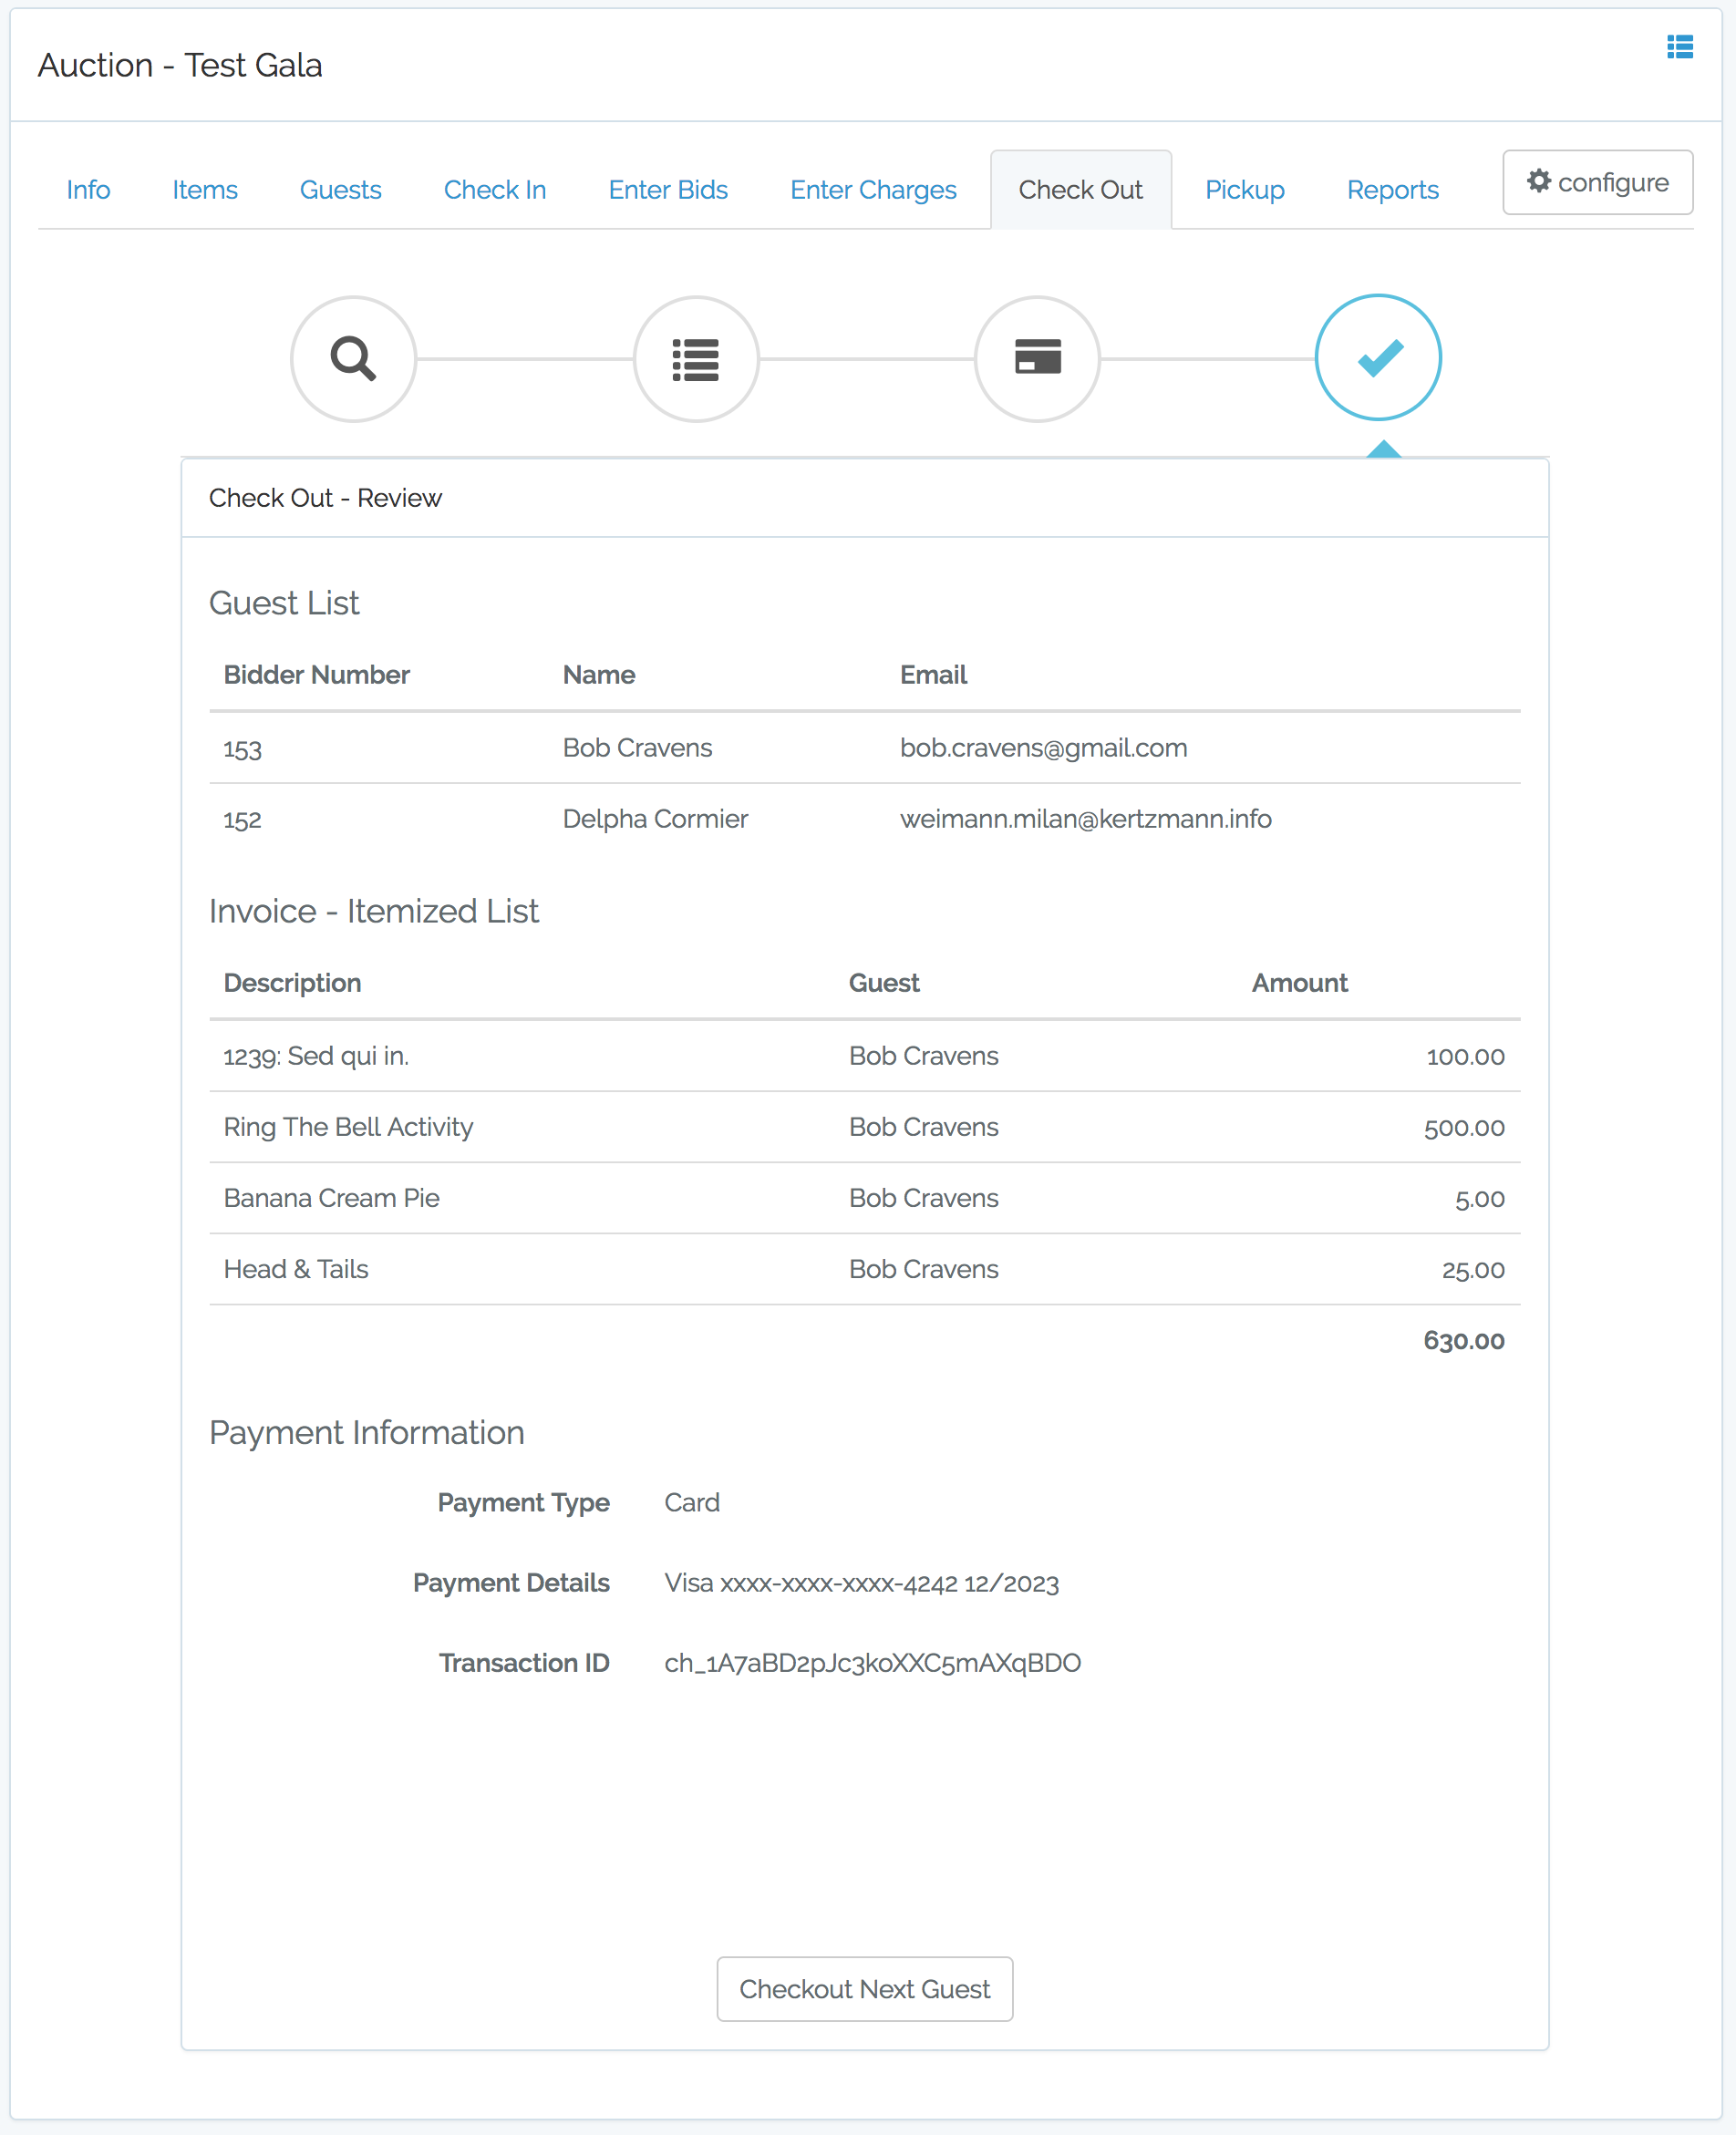
The final page repeats the guest list, itemized list but includes the transaction information for the payment. This is more for a confirmation page as the guest will receive an email receipt and possibly (if enabled) an SMS receipt. Click the "Checkout Next Guest" button to start the checkout process again for a new guest.
Notifications & Receipt
After successfully billing a guest, emails are sent to the addresses entered during the checkout process. Here is an example:
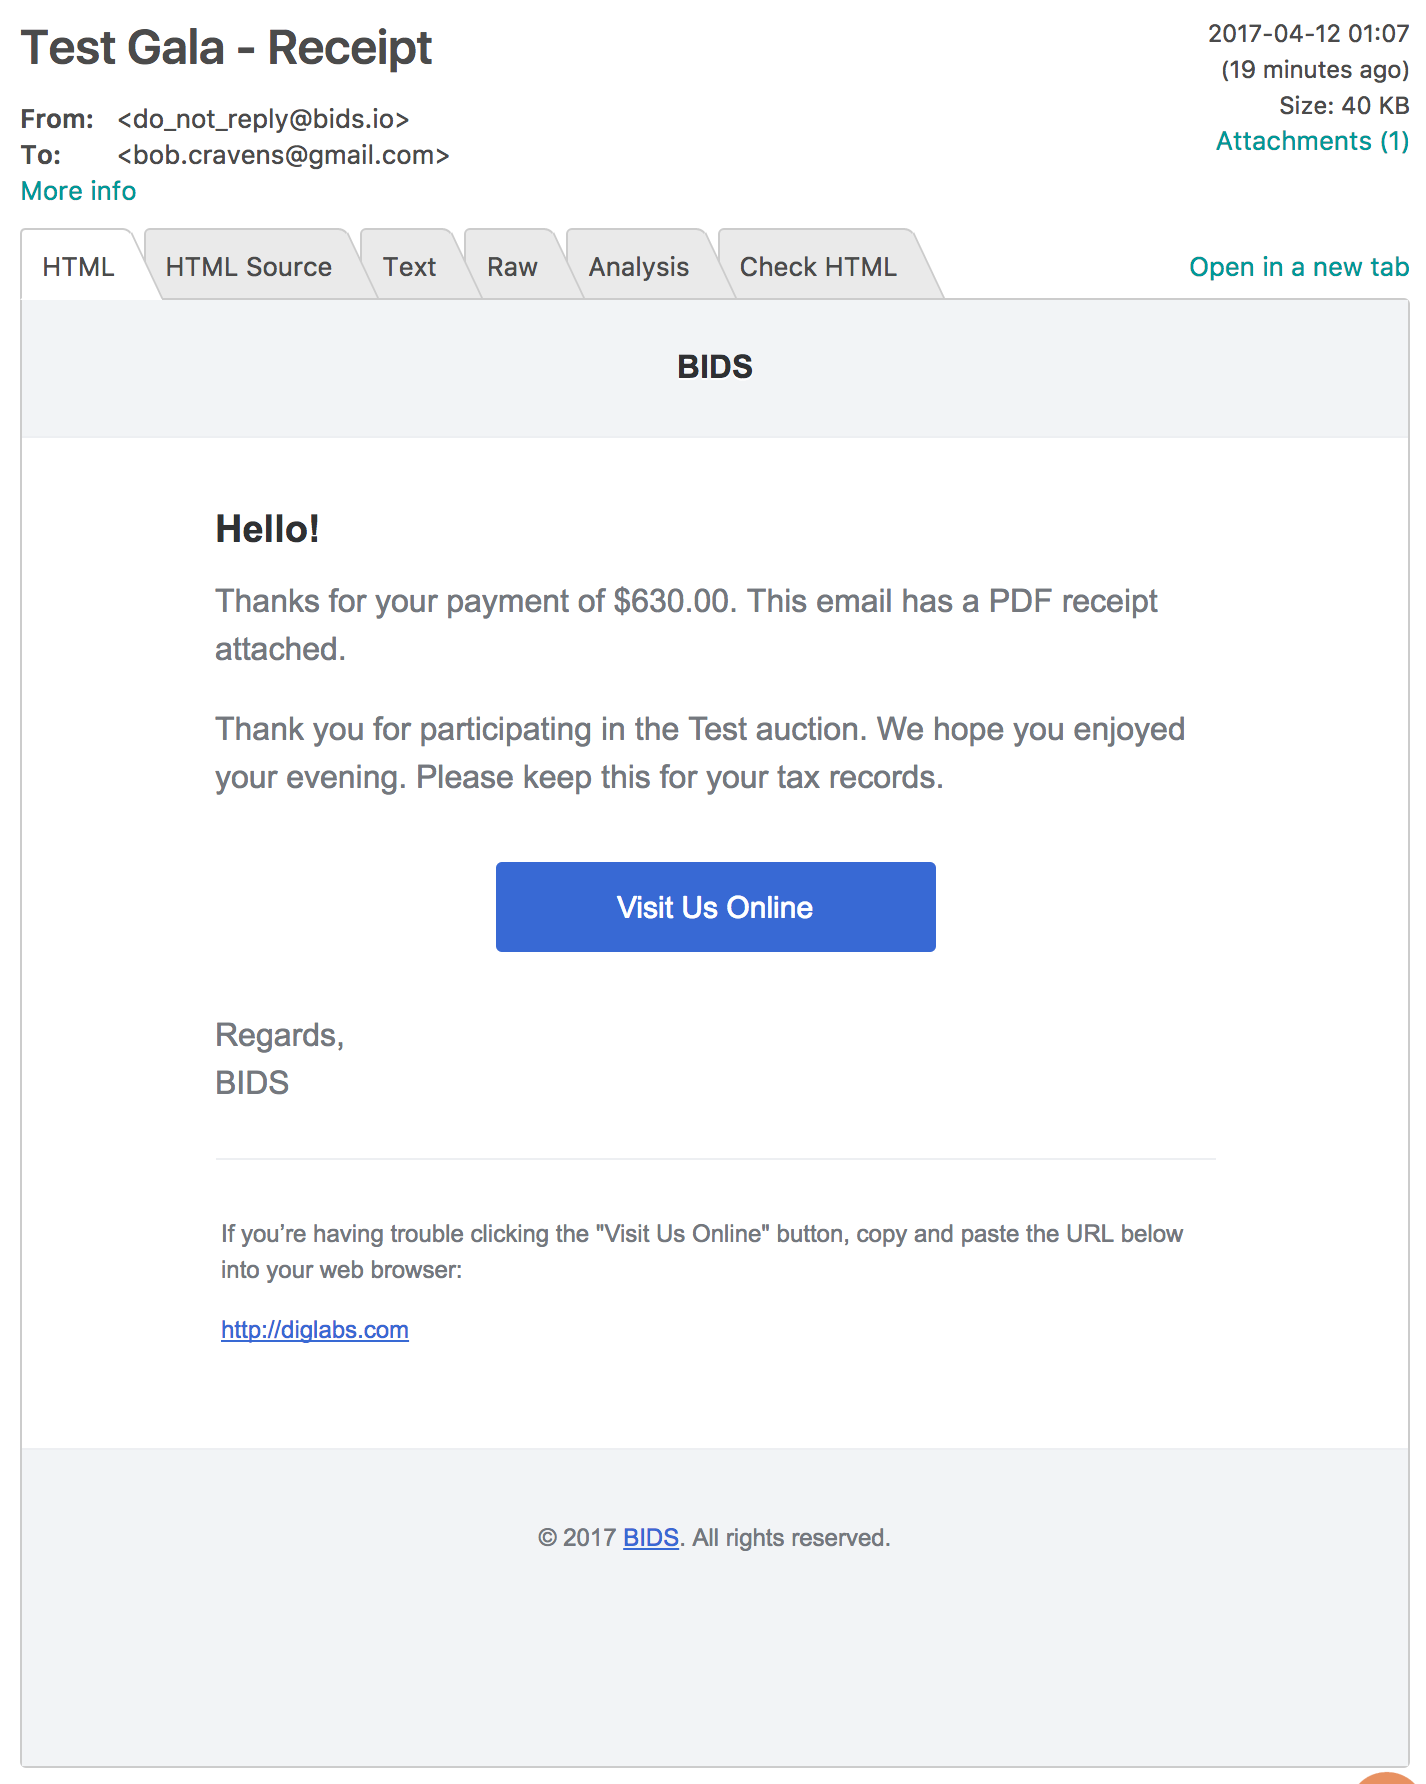
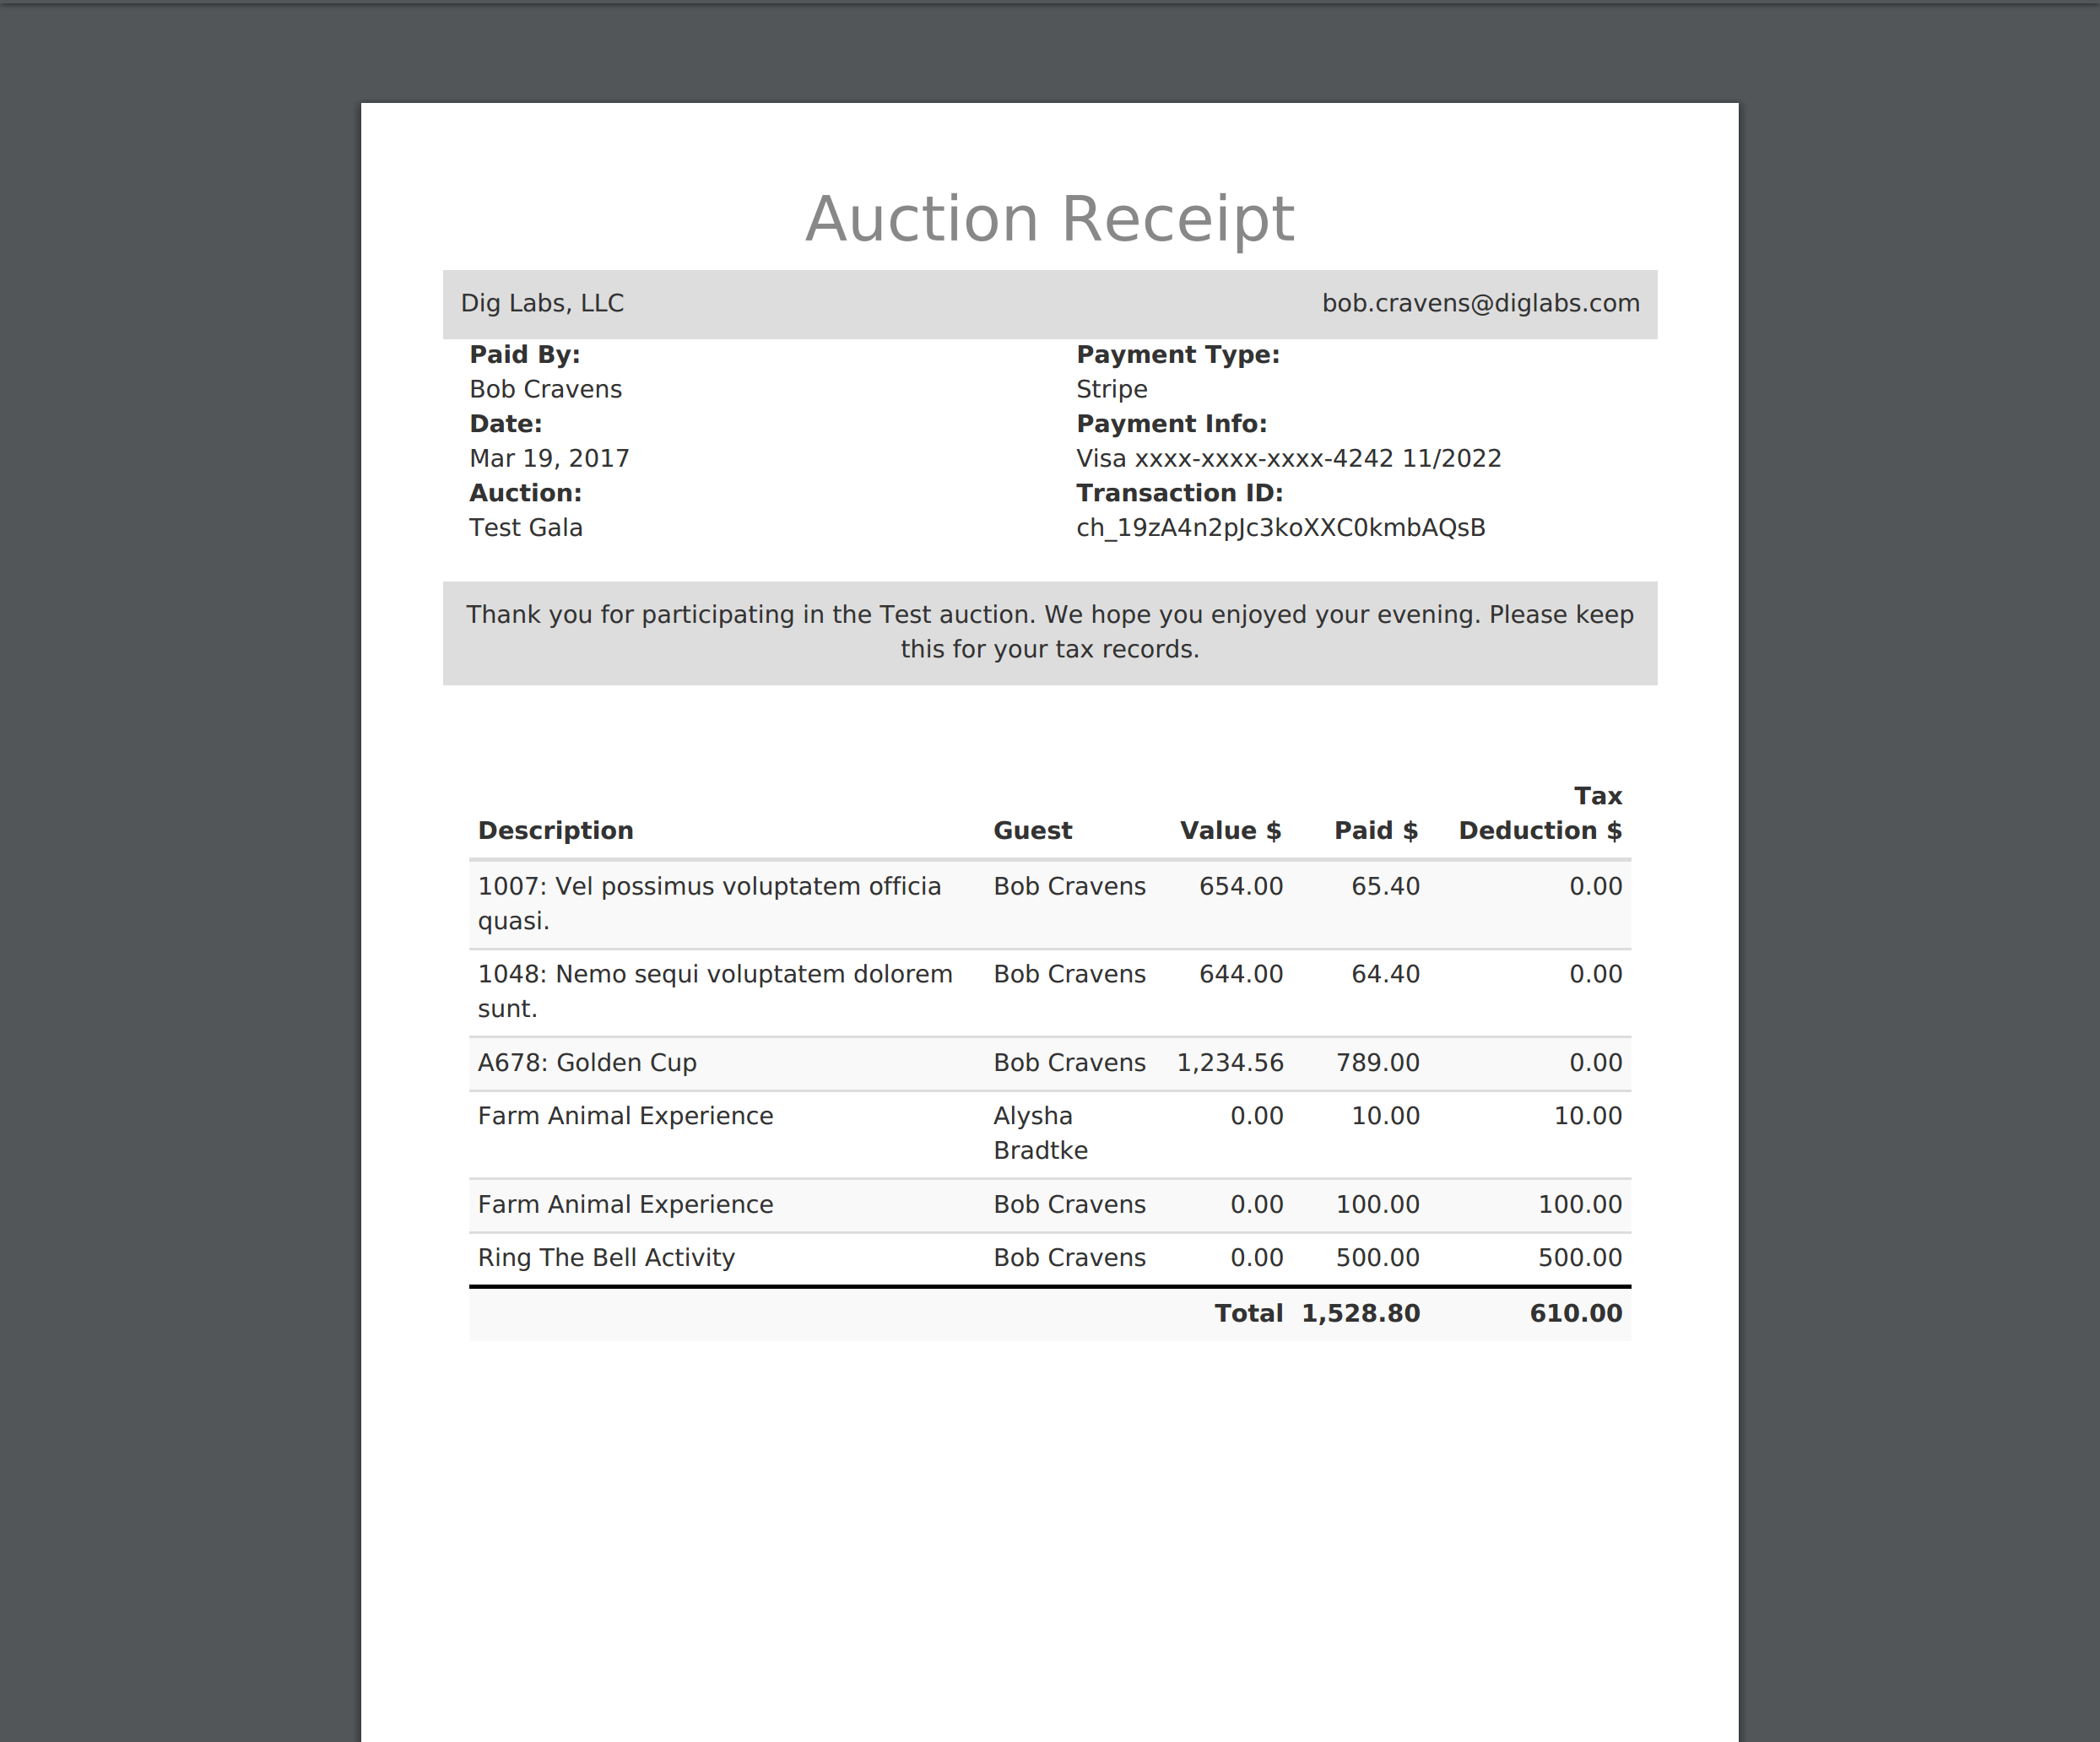
This email has a single attachment (upper-right corner) which is a PDF copy of the receipt. Here is an example receipt:
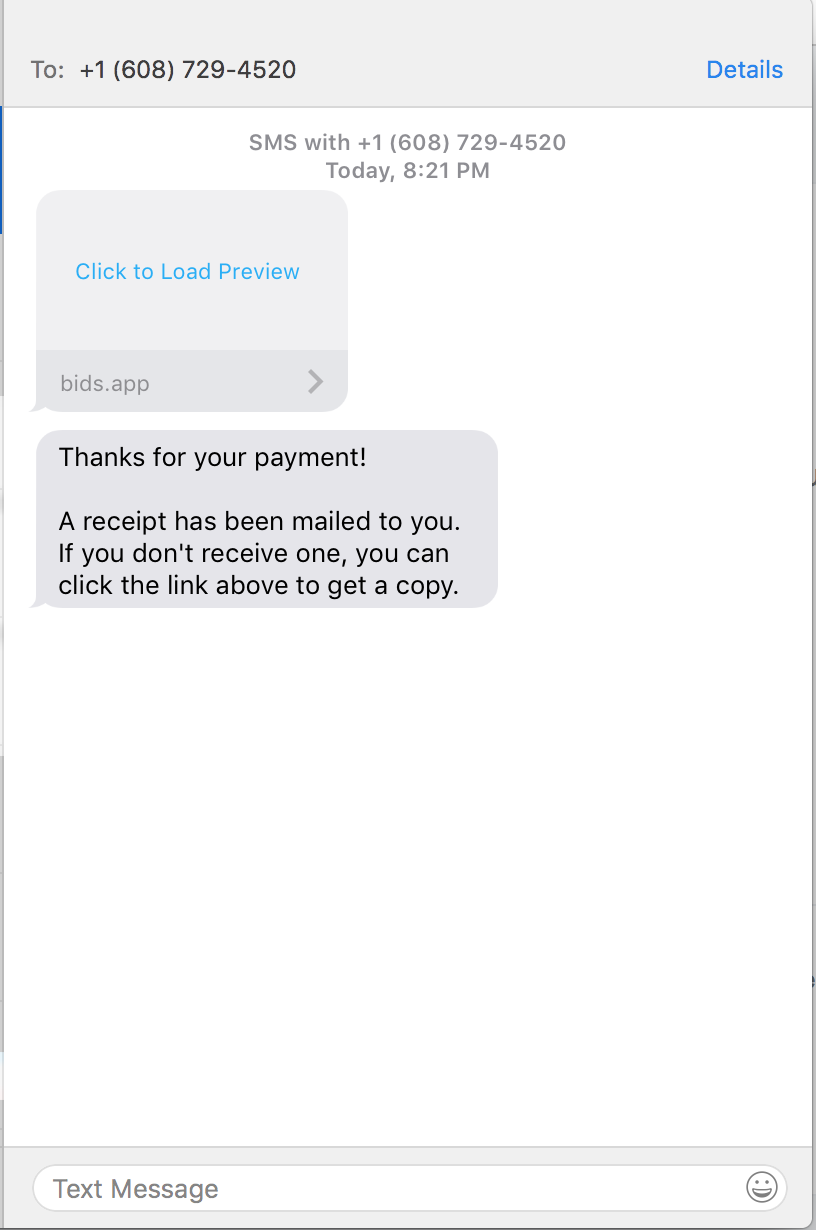
If SMS notifications are enabled, the guest will also receive a text message after a successful billing. This text message also includes a link to the PDF receipt. Here is an example: